PuTTY with SSH key tutorial
This tutorial shows how to generate a new SSH key, then configure a PuTTY session to use it.
What's this?
To login to the server, instead of a password, you use a key.
This key is divided in two parts:
- the public key, you give freely (you can publish it on your webpage for example) where you need to have an access
- the private key, you keep very safely and privately for you and only you
The public key is more like a login, the privave key more like a password.
Generate a new SSH key
PuTTY ships a software to generate a key, PuTTYGen. You can download it on http://www.chiark.greenend.org.uk/~sgtatham/putty/download.html.
Step 1. Run it, and you've this screen. Click on the generate button.
Step 2. Move the mouse to generate some randomness. That will be used to generate a random key, a key we can't guess.
If nothing happens, you need to move the mouse cursor in the empty area.
PuTTYgen needs that to pick numbers for your private key.
Step 3. Copy/paste the content of first textarea (ssh-rsa ...): this is your public key.
Save safely where you want the key ("Save private key").
If you set a password, the key will be encrypted, and a password asked each time you use the key.
Configure a PuTTY session to log in with a SSH key
Now the SSH key is generated, let's configure a PuTTY session with all the elements we use to connect to a server:
- the server host name
- your username
- the SSH key
PuTTY doesn't consolidate these settings in the same page, so we'll visit several option pages.
This process is only to do once, you'll then be able to connect only double clicking on the saved session name.
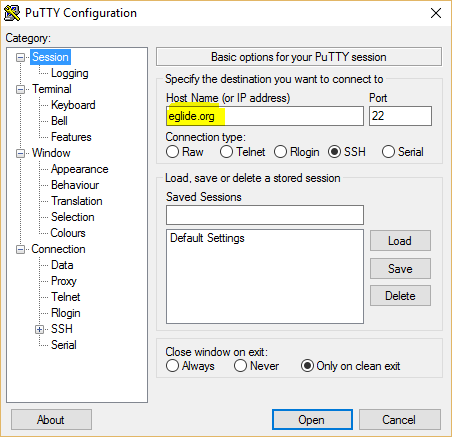
1. Create a new session specifying the host name, eglide.org. Ensure you select SSH and port is well 22, but that's default values.
2. You can give more details so login is pretty automatic. In the left menu, choose Connection > Data. At right, you can write your username, normally in lowercase.
3. Then go to Connection > SSH > Auth to specify the path to the key.
Note: If you connect to several servers, you can skip this step 3 and configure a SSH agent instead through Pageant. The agent will then be responsible to provide the keys.
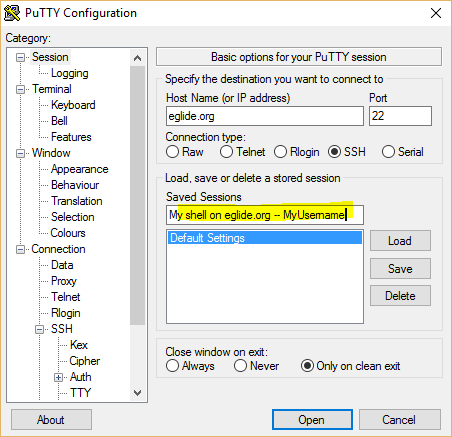
4. Now we've submitted all the required information, we can save the session. Give the name you wish like Eglide or something more comprehensive:
5. Then click on save button.
Congratulations, you've now a PuTTY session configured.
Right now and in the future, each time, you wish to connect, just double click on the session name.


